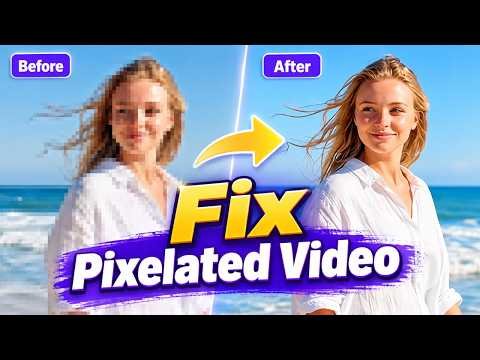
Have you ever played a video and noticed blurry images, blocky pixels, or unclear details? Pixelated videos can ruin your viewing experience. They can also make professional content look unpolished. Fortunately, you don’t always need expensive software to solve this problem.
If you want to learn how to fix pixelated video, you have several practical options. You can adjust video settings, improve your internet connection, use editing software, or try AI video enhancement tools.
However, the right solution depends on why your video looks pixelated. Sometimes, a weak internet connection causes the problem. In other cases, low resolution or excessive compression damages the footage.
This guide explains nine effective ways to improve video quality. Follow these simple steps to make your videos look clearer.
What Causes a Video to Look Pixelated?
Before fixing the problem, you should understand its possible causes. Pixelation happens when an image loses visual detail. As a result, you see small squares or blocky patterns instead of smooth images.
Here are some common reasons:
- Low video resolution: The original video has insufficient pixels.
- Heavy compression: Video compression removes visual information.
- Poor internet connection: Streaming services reduce quality to prevent buffering.
- Incorrect export settings: Editing software may produce low-quality output.
- Outdated graphics drivers: Display issues can affect video playback.
- Digital zoom: Enlarging a small video makes individual pixels more visible.
Now, let’s explore how to fix these problems.
How to Fix Pixelated Video: 9 Effective Methods
1. Increase the Video Resolution
First, check the video’s resolution. A low-resolution video often looks blurry on larger screens.
For example, a 480p video may look acceptable on a small phone. However, it can appear pixelated on a large television.
Try these steps:
- Open your video editing software.
- Import the original video.
- Check its current resolution.
- Select a suitable export resolution.
- Export the video and review the result.
For better viewing, use 1080p or higher when your original footage supports it.
Note: Increasing resolution alone cannot restore details that the original video never captured.
2. Use AI Video Enhancer Tools
AI video enhancers can improve the appearance of low-quality footage. These tools analyze frames and attempt to reconstruct missing visual details.
Some popular options include:
- Topaz Video AI
- HitPaw Video Enhancer
- AVCLabs Video Enhancer AI
Most tools offer features such as:
- AI upscaling
- Noise reduction
- Sharpening
- Face enhancement
- Frame improvement
For example, you can upload a low-resolution video and select an AI enhancement model. Then, preview the result before exporting.
However, AI enhancement may create artificial details. Always compare the output with your original footage.
3. Reduce Video Compression
Excessive compression is another common reason for pixelated videos.
When you compress a video too much, the software removes visual information. Consequently, you may notice blocky areas, especially during movement.
To avoid this problem:
- Open your video editor.
- Choose the export settings.
- Select H.264 or H.265.
- Increase the video bitrate.
- Export and check the quality.
For 1080p footage, you can start with a bitrate around 8–12 Mbps. However, the ideal setting depends on frame rate, movement, and content.
Higher bitrates generally preserve more visual detail, but they also create larger files.
4. Improve Your Internet Connection
Sometimes, the video itself is perfectly fine. Instead, your internet connection causes poor streaming quality.
Streaming platforms automatically reduce resolution when your connection becomes unstable.
Try these solutions:
- Restart your Wi-Fi router.
- Move closer to your router.
- Use an Ethernet connection.
- Close unnecessary downloads.
- Pause other streaming activities.
- Select a higher playback resolution manually.
Additionally, restart the video after your connection improves.
This method works particularly well when YouTube or other streaming platforms display blurry footage.
5. Adjust Sharpness and Noise Reduction
Video editing tools offer several adjustments that can improve visual clarity.
For example, sharpening makes edges appear more defined. Noise reduction removes unwanted visual grain.
Follow these steps:
- Import your video into an editor.
- Find the sharpening settings.
- Apply a small sharpening adjustment.
- Add noise reduction if necessary.
- Preview the result.
- Export your improved video.
However, avoid excessive sharpening. Too much can create unnatural edges and make compression artifacts more noticeable.
6. Use Professional Video Editing Software
Professional editing software gives you greater control over video quality.
Some useful options include:
- Adobe Premiere Pro
- DaVinci Resolve
- Final Cut Pro
These programs provide tools for color correction, noise reduction, sharpening, and export optimization.
For beginners, DaVinci Resolve offers a useful starting point. You can adjust several video properties without immediately purchasing professional editing software.
Moreover, always use the original footage instead of an already compressed copy.
7. Update Your Graphics Drivers
Outdated graphics drivers can sometimes cause video playback problems.
If videos look pixelated across multiple applications, check your graphics drivers.
For Windows users:
- Open Device Manager.
- Expand Display adapters.
- Identify your graphics card.
- Visit the manufacturer’s official website.
- Download the appropriate driver.
- Install it and restart your computer.
You can also check for updates through Windows Update.
However, remember that driver updates won’t restore missing details in a low-quality video file.
8. Avoid Excessive Digital Zoom
Digital zoom enlarges existing pixels rather than capturing additional image details.
As a result, faces, objects, and backgrounds may look blocky.
To prevent this issue:
- Record videos at a higher resolution.
- Avoid unnecessary digital zoom.
- Use optical zoom when available.
- Keep your camera stable.
- Maintain a suitable distance from your subject.
If you already have pixelated footage, try cropping less of the original image.
9. Export Your Video With Better Settings
Incorrect export settings can reduce video quality even when your original footage looks excellent.
Therefore, check your export settings before publishing.
Here are some recommended starting points:
| Setting | Recommended option |
|---|---|
| Resolution | Match original footage |
| Format | MP4 |
| Video codec | H.264 |
| Frame rate | Match source footage |
| Bitrate | 8–12 Mbps for 1080p |
| Quality | High |
| Audio codec | AAC |
These settings work as a starting point for many 1080p videos. Adjust them according to your content and platform requirements.
Read More: YouTube to MP3 Converter Free: Safe & Legal Guide
Best Tools to Fix Pixelated Videos
Choosing the right software makes video enhancement easier.
Here are three options worth considering:
| Tool | Best for |
|---|---|
| Topaz Video AI | AI upscaling and enhancement |
| DaVinci Resolve | Professional video editing |
| HitPaw Video Enhancer | Beginner-friendly AI enhancement |
Before choosing a tool, check its system requirements, pricing, and available features.
How to Prevent Videos From Becoming Pixelated
Fixing video quality is useful. However, preventing pixelation saves time and effort.
Follow these practical tips:
- Record footage at 1080p or 4K when possible.
- Use good lighting while recording.
- Avoid unnecessary compression.
- Export videos with suitable bitrates.
- Keep original video files.
- Avoid repeatedly converting the same video.
- Check your export settings before publishing.
Most importantly, preserve your original footage. It gives you more flexibility when editing or enhancing videos later.
Frequently Asked Questions (FAQs)
1. Can you fix a pixelated video without losing quality?
You can improve its appearance using AI enhancement, sharpening, and noise reduction. However, you cannot perfectly recover details that compression or low resolution permanently removed.
2. How do I make a pixelated video clear?
First, identify the cause. Then, try AI upscaling, noise reduction, improved export settings, or a better internet connection. The right method depends on the source of pixelation.
3. Can AI remove pixelation from videos?
Yes. AI video enhancers can reduce visible artifacts and improve apparent detail. However, results vary depending on the original footage and the enhancement model.
4. Why does my video look pixelated after uploading?
Social media platforms often compress uploaded videos. This compression reduces file size but can affect visual quality. Upload a high-quality source and follow the platform’s recommended export settings.
5. What is the best software to fix pixelated videos?
Topaz Video AI is worth considering for AI enhancement. DaVinci Resolve works well for editing and manual adjustments. Your best option depends on your experience, budget, and video quality.
Conclusion
Pixelated videos can result from low resolution, excessive compression, unstable internet, or incorrect export settings. Fortunately, you have several ways to improve their appearance.
Start by checking the original resolution and bitrate. Then, try AI enhancement, sharpening, noise reduction, or professional editing software.
Remember, how to fix pixelated video depends on the underlying problem. No single method works perfectly for every video.
Use the techniques in this guide and compare your results. Also, preserve your original footage to maintain the best possible quality.
Ready to improve your video quality? Try these methods today and turn blurry footage into clearer, more professional-looking content.